Before You Start
This guide assumes you have administrator access to both QuickBooks Online and Shopify. You’ll also need your chart of accounts ready.
Overview
What You’ll Learn
- How to prep your QuickBooks accounts for clean syncs
- Setting up A2X for automated daily syncs
- Mapping taxes and fees correctly
- Reconciling Shopify payouts with bank deposits
1. Preparation Steps
Before connecting anything, you need these accounts in QuickBooks:
Required Accounts
- Shopify Sales (Income)
- Shopify Fees (Expense)
- Shopify Payouts (Bank/Asset)
- Sales Tax Payable (Liability)
Optional (but recommended)
- Shopify Refunds (Expense)
- Shopify Discounts (Income Reduction)
- Shopify Gift Cards (Liability)
2. Choosing Your Sync Method
You have two main options, each with serious pros and cons.
Method A: The Official “QuickBooks Online” App
This is the free app built by Intuit.
- It’s free.
- Good for simple setups.
- Imports sales as a summary.
- Lacks granular control.
- Inventory sync is basic.
- Can be hard to troubleshoot.
Method B: Third-Party Connectors (A2X, Bold)
These are paid apps that offer far more control.
Expert Tip: We strongly recommend using a third-party connector like A2X. It uses the “settlement” or “payout” method, which perfectly matches the bank deposits from Shopify, making reconciliation a one-click process.
3. Step-by-Step: Syncing with A2X
Here is the high-level workflow for a clean setup.
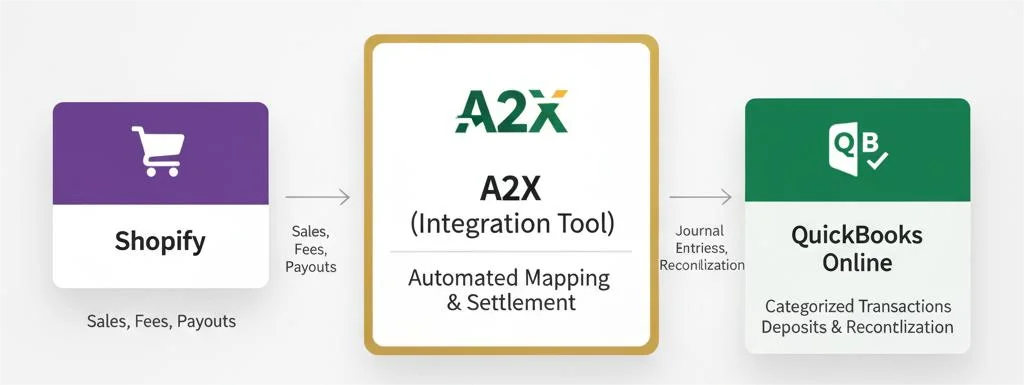
This is how data should flow: from Shopify, processed by a tool like A2X, then sent to QuickBooks.
Here is a sample code block to show how an API call might look.
{
  "order_id": 12345,
  "customer": "John Doe",
  "total": 115.00,
  "line_items": [
    { "sku": "QB-SH-BOOK", "quantity": 1 }
  ]
}
4. Setting Up A2X
- 1
Connect Shopify to A2X
Authorize A2X to access your Shopify store. Use the same email as your QuickBooks account.
- 2
Connect A2X to QuickBooks
Link your QBO account in A2X settings. Grant admin access when prompted.
- 3
Map Your Accounts
Assign your Shopify sales, fees, and payouts to the correct QBO accounts.
Common Error: Wrong Account Type
Make sure your Shopify Payouts account is set as a Bank account type in QuickBooks, not Income or Asset. This ensures proper reconciliation.
5. Testing Your Setup
Test Import Checklist
- Import a test payout from last month
- Verify all amounts match Shopify
- Check tax calculations are correct
- Confirm bank deposit amounts align
Need Help?
Get Support
Having trouble with your setup? Our team can help troubleshoot your specific workflow.
Contact Us